If you're considering giving your kitchen a fresh look, spray-painting laminate kitchen cabinets is the perfect solution. And at a fraction of the cost of a remodel. Despite what some may say, painting laminate is possible, as long as the proper preparation and technique are used. Read on to find out everything you need to know about updating your outdated laminate cabinets with spray paint.

Laminate surfaces have a reputation for being difficult to paint, which is not undeserved. Their shiny and slick surface means there is little for the paint to "grip onto" compared to a more rough and textured surface.
Because of this, paint often doesn't adhere or stick to the surface properly, which can cause it to lift and flake after a while.
This doesn't mean that painting laminate cabinets is a lost cause, however! It can be done, with the right prep work, techniques, and tools.
Take a look: Can You Spray Paint Kitchen Worktops?
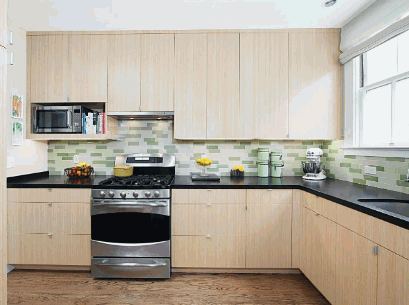
Painting your laminate cabinet doors and kitchen doesn't have to be a DIY job, and we'll go into why a professional like Revamp Spray might be your best option later, but this is a project that many people do choose to do themselves. Let's take a look at how.
When working with paint and other chemicals, you should always make sure that you protect yourself by using the right safety equipment.

Spray painting laminate cabinets requires a fair amount of prep work and you will need some supplies for this.
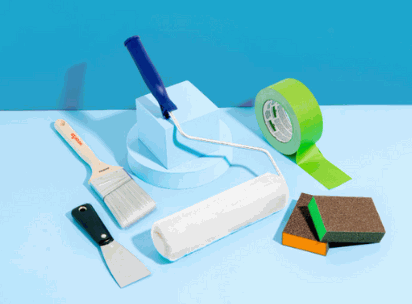
Getting the right supplies for the painting will help to ensure a high-quality finish.
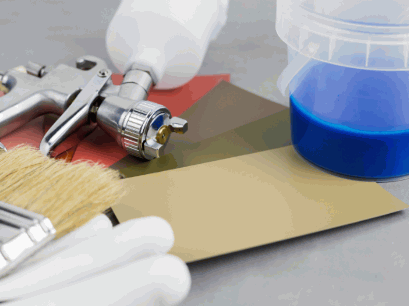
As they say, preparation is key, and nowhere is this more true than painting laminate cabinets. The surface of your old laminate cabinets needs to be prepared properly before you even think about getting the paint out.
First, you should remove the cupboard doors and drawers, and all hardware (including door knobs and handles) using a screwdriver. Once all the doors are removed, you should start cleaning the cabinet surfaces.
Use a degreaser such as sugar soap and a damp cloth, with a bucket of warm water. This step is vital because any grease left on the kitchen cabinets will create a slick surface that will prevent the paint from adhering properly.
Once you have finished cleaning, rinse with clean water, and then leave to dry.
Now you should cover any hardware that can't be removed with painter's tape to avoid it getting splashed with paint.
It is a good idea to spend some time inspecting the cabinets for damage. If you see any cracks or holes, you can repair them using wood filler or laminate seam filler. If you notice any laminate that is lifting, you can stick this back down using wood glue.
This step is important because any imperfections in the surface will be obvious after the paint has been applied.
You should always sand laminate cabinets before painting them. Since laminate's smooth surface makes it difficult for paint to adhere properly, the best way to get a good result is to spend some time roughing it up. This can be easily achieved using sandpaper.
A light sanding is all that is needed. Laminate is a very thin material, so if you go in too hard, you can remove too much. All you need to do is gently rough up the surface using fine-grit sandpaper. You can either do this manually or with an orbital sander.
Once you have removed the finish from the laminate, you should use a vacuum cleaner to remove all of the resulting dust. Then wipe down the surface with a clean damp cloth.
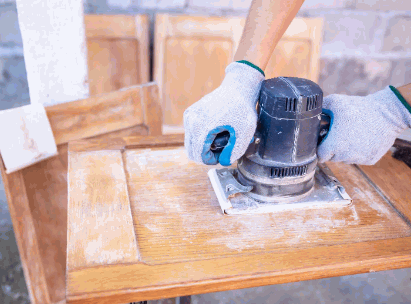
A primer is applied to a surface before paint to prepare the surface for painting. Like sanding, its purpose is to create a surface that is textured enough for paint to stick well.
Priming laminate can face the same issues as painting it so it is important to use a high-quality primer that is designed for laminate surfaces. This will make sure it sticks properly and doesn't lift.
You can apply the primer either using a roller or a spray gun. Use thin coats to ensure that the surface is covered evenly. You can use a paintbrush for hard-to-reach areas and edging.
Once the first coat is applied, leave it to dry completely before applying the second coat. You can then sand again (very lightly) if you want some added certainty that the paint will adhere.
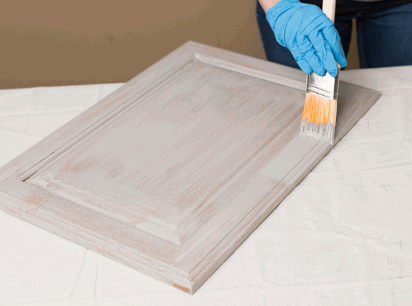
Once the laminate kitchen cupboards have been cleaned, repaired, sanded, and primed, you can start the painting process.
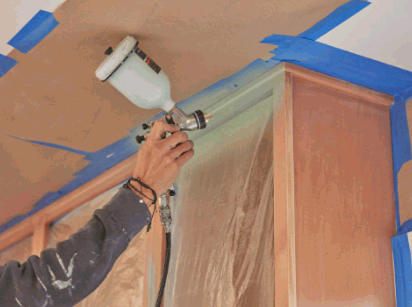
You have several options for painting laminate cabinets, and they each have their own strengths and weaknesses.
You will also need to think about what sort of finish you want to achieve. Paint finishes can generally be put into three categories:
It is always a good idea to test out the paint on a small area before covering the cabinets completely. This will help to check that the paint will work on the laminate and that the finish is what you want.
Look into: Vinyl-Wrapped Kitchens Or Spray-Painted Kitchens?
If you have been able to remove the cabinet doors, it is best to paint them outside. You set up a spray station by propping them up on some blocks or a painter's table.
Inside, you should cover everything you don't want painted with plastic sheeting and painter's tape. Go back over all the surfaces with a tack cloth to remove any remaining dust.
Apply the spray paint in thin, even coats to prevent drips and runs. Aim to keep the spray can or gun approximately 12-18 inches away from the cabinet surface.
Spray in smooth, back-and-forth motions. Try to overlap with each pass to help ensure even coverage. Start spraying just before the edge, and carry on spraying for a little while after you leave the next edge. This helps to avoid paint pooling at the edges.
Once the first coat is applied, leave it to dry before applying the second coat. The second layer can often be the top coat, but if you are changing the colour from dark to light, you may need a third.
You can also add a final finish layer, although this is optional. This serves to add durability by forming a protective layer that reduces wear and tear and damage to the paint. This can be a sensible option in an area like a kitchen, where there is lots of heat, mess, and moisture.
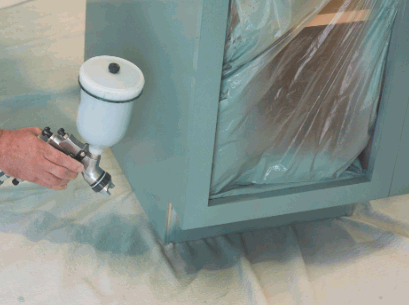
Leave the paint to dry completely, usually 24-48 hours. Then reassemble and re-attach the cabinets and your kitchen transformation is complete!

While laminate cabinets can be a DIY paint job, if you want the perfect finish, it is a good idea to use a professional. This is still much less expensive than completely remodelling your kitchen, and your cabinets will look factory new.
Laminate is not the ideal surface for painting, so preparing it is key. Proper cleaning, sanding, and priming are crucial for a long-lasting and high-quality paint finish.
Professionals are trained to complete each of these steps correctly and ensure that your new-look kitchen is perfect. They will also have a better knowledge of different materials and how to handle them and will be trained in proper paint spraying techniques.
Professionals use commercial-grade spray guns and painting equipment that deliver a smoother and more even finish than shop-bought varieties because they allow for finer control.
They will also often have access to higher-quality paints, primers, and finishes that will typically offer better adhesion on laminate surfaces.
A professional can complete the job much faster than a DIY project. It is, of course, also a lot less effort for you. Disassembling cabinets, taping off areas, setting up a spray station, and waiting for coats of paint to dry can be very time-consuming. Hiring a professional means that it will get done more efficiently, and with less stress for you.
Spray painting can release fumes that are harmful to your health, which means that taking proper safety precautions like ventilation and using the right protective gear is vital. A professional will have knowledge and training in how to safely handle paint and chemicals, and to ensure that the job is done correctly.
Achieving a smooth, even finish on laminate cabinets can often rely on perfect detailing. A professional will ensure that every last touch is finished, ensuring that small areas are painted properly and that the finish is clean, with no visible brush strokes or other inconsistencies.
Mistakes made during a DIY project can be costly to fix, so it is often better to bring in a professional from the start. This could be anything from uneven paint to drips, or peeling, and the entire job may need to be redone.
If you are thinking of selling your home, a professionally done repainted kitchen can help to make a good first impression to any potential buyers, and could even increase your home's value.
Learn about: How Much Does It Cost To Spray Paint Kitchen Cabinets
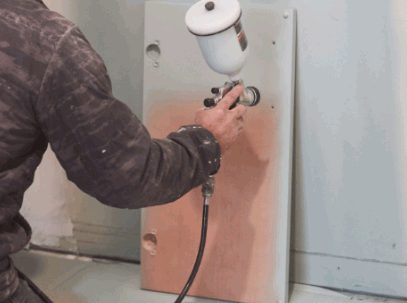
If you're looking to transform your old laminate cabinets with spray paint, Revamp Spray can help. Our expert team specialises in rejuvenating homes using professional quality paints, equipment, and techniques.
We ensure long-lasting, beautiful results, and we take care of everything from start to finish. Whatever your dream kitchen looks like, we can help you to achieve it, with your choice of colour and finish.
Contact us today to find out more about our laminate cabinet spray painting service.
It is possible to spray paint laminate cabinets, although the material does make the job more tricky compared to rougher solid wood. Ensuring that paint sticks to smooth laminate requires proper preparation, products, and techniques. This is a job that you can do yourself, but for the best results, it is best to bring in a professional service who knows how to handle laminate.
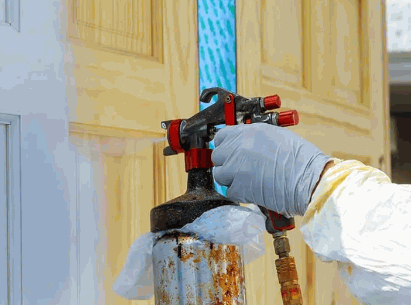
Your kitchen worktops make arguably the biggest impact on the room's design. So if they are looking a little tired and outdated, you might be thinking about how to fix them up. You could opt for a complete kitchen renovation, but spray painting kitchen worktops is a popular, quicker, and cheaper solution. Read on to find out how to spray paint kitchen worktops.
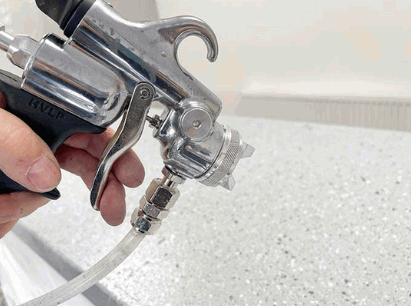
The average cost of replacing a kitchen worktop can be anything from £600 up to £4,000, depending on the size and the materials used. Laminate surfaces, for example, would be cheaper to replace than natural stone, granite, or quartz. Spray painting would cost much less than this.
If you are spray painting your kitchen worktops, you have complete control over the design. You can choose the exact finish and colours of the paint, and create a kitchen that is everything you are imagining.
Spray painting kitchen worktops can be done in a weekend, whereas replacing kitchen worktops can take significantly longer. It is a more involved job that involves cutting, measuring, sourcing materials, installation, etc.
It is more environmentally friendly to repaint your existing kitchen worktops than to replace them. If you want to reduce your environmental impact, restoring the kitchen you already have is a good way of doing that.
Check out: Can You Spray Paint Laminate Kitchen Cabinets?
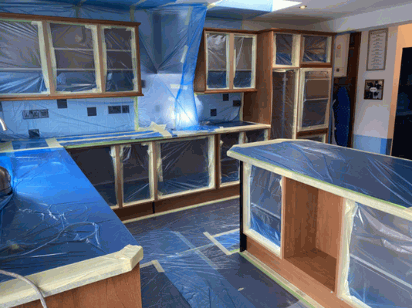
Spray painting your kitchen worktops can be a DIY project, although if you want a high-quality finish and long-lasting results, it can be better to use a professional company like Revamp Spray. Let's take a look at the spray painting process for kitchen worktops.
You should use a degreaser to remove all grease and dirt from the kitchen worktops. This is an important step because grease will reduce paint adhesion and can lead to lifting and peeling.
To improve paint adhesion further, you should lightly sand the worktop surface. This creates a rough texture that allows the paint to "grip on" and stick more securely.
You should then cover any areas you don't want to be painted using painter's tape and plastic sheeting.
A primer creates a surface that helps paint to stick. You should use a good quality primer that is designed for your worktop materials. A primer that is designed for laminate, for example, won't be the ideal choice for a granite worktop or a stone surface.
Allow the primer to dry completely before moving on to painting.
Several paint types would be suitable for a kitchen worktop, and they each have their advantages and disadvantages.
Discover: How To Paint Kitchen Cupboards
This is one of the most popular choices for spray painting kitchen worktops. It consists of textured, multi-coloured spray paints that are designed to mimic the appearance of granite or stone surfaces. The system usually includes a primer, paint, and protective topcoat.
This is a cost-effective way of creating a sophisticated granite look at a fraction of the cost of installing granite worktops. It creates a durable finish, comes in a variety of textures and colours, and can be applied to most worktop materials with strong adhesion.
It doesn't, however, withstand heat as well as other options, and it can be susceptible to scratches if it isn't installed with a decent protective sealant.
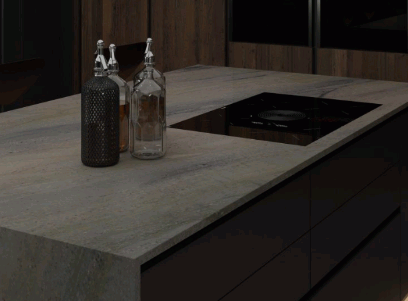
Epoxy spray is another popular option for painting kitchen worktops, mainly due to it being a heat-resistant paint. It is a two-part system that consists of epoxy resin and a catalyst/hardener. When combined, these create a tough, glossy coating.
Epoxy resin will adhere strongly to any type of kitchen worktop material, and it creates a chemical, scratch, impact, abrasion, water, and heat-resistant surface that is ideal for areas of heavy use like kitchens. This high level of durability makes epoxy resin a decent investment.
It is also stain-resistant, so will retain its finish for a long time. It can be tinted in any colour, and embedded with decorative chips, metallic pigments, or flakes.
However, it is often more expensive than other spray paint options, and it requires perfect installation to achieve the desired finish and durability.
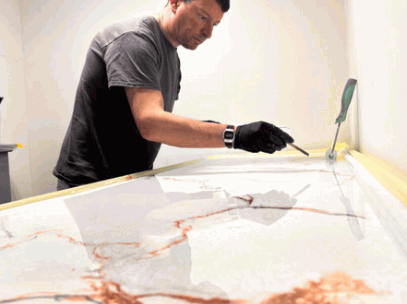
Acrylic spray paint is water-based, dries quickly, and comes in a wide range of colours. It is fast-drying and easy to apply. When sealed with a protective topcoat, it can be quite durable, but it isn't suitable for heavy kitchen use like cutting or high temperatures.
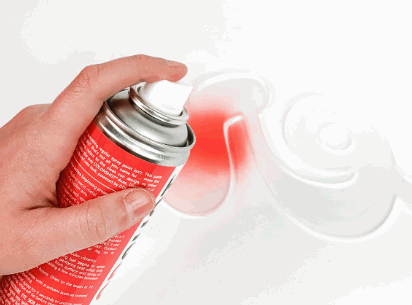
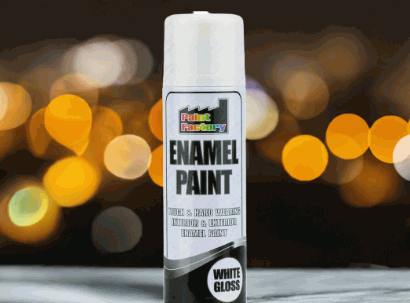
Enamel spray paint dries to a hard, glossy finish that is resistant to moisture and can withstand moderate wear. It isn't strong enough to withstand heavy use, however, and it can chip if it isn't applied properly or if the surface isn't prepared suitably well before application.
The exact spray painting process will depend on the type of paint used. For systems like epoxy or granite spray, the application techniques are specialised and will usually require a professional, whereas other types of spray paint like acrylic can be done as a DIY project.
When spray painting kitchen worktops, you should apply multiple thin coats rather than one thick coat. This creates a more even and smoother finish.
Use a smooth sweeping movement to avoid drips or streaks, holding the spray can or gun 12-18 inches from the worktop surface.
Wait for the first coat to dry before applying the second coat, followed by a protective sealant (if you are using one).
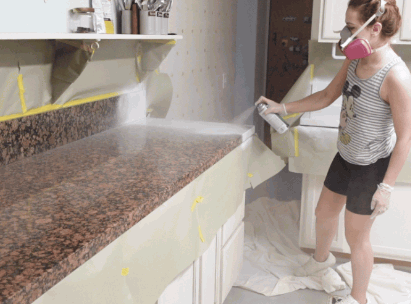
The drying time can vary depending on the type of paint used and the temperature/humidity of the kitchen, but it will usually take between one and two days to dry completely. You shouldn't attempt to use the kitchen worktops before the paint has dried.
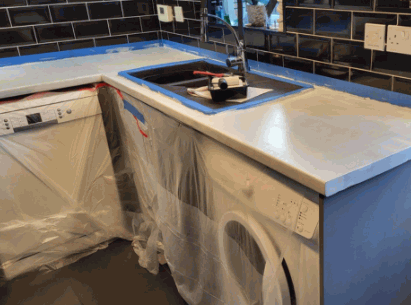
If you are looking for a professional to create a high-quality finish on your kitchen worktops, Revamp Spray can help. Our professional kitchen worktop spray painting service provides a cost-effective alternative to replacing your kitchen worktops, while giving you complete control over your kitchen design.
Whether you're looking to refresh old and tired-looking worktops, or you just want a new design for your kitchen, our service will make your kitchen look like new.
Our experienced team has the professional knowledge to deal with all types of worktop materials, ensuring a flawless finish every time. And we will customise the finish to perfectly match your style.
Contact us today to find out more about our kitchen worktop spray painting service, and start your kitchen transformation today.
It is possible to spray paint kitchen worktops, and it can be a cost-effective alternative to replacing them. The main challenge is ensuring that the paint can withstand kitchen use, and ensuring that the surface is properly prepared before application. Some types of kitchen worktop spray paints can be applied yourself, although it is often better to use a professional service. This ensures a long-lasting, durable finish.
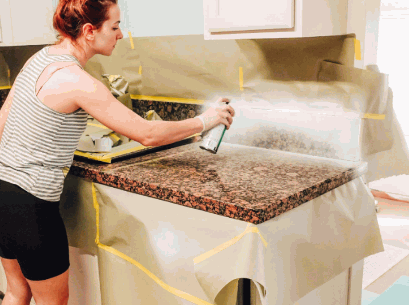
A quick Pinterest search will reveal that painted kitchen cabinets are now trending. Painting your kitchen cabinets is a cheap and simple method to update your space without major remodelling. It is not necessary to use vivid colours. You may completely transform the look of your kitchen by just painting the walls a muted earth colour or a soothing grey.
Since painting your kitchen cabinets requires a lengthy drying time, it's not something you should speed through. Given how much time we spend there, you wouldn't want to be confronted by a shoddy paint job whenever you popped into the kitchen for a snack.
Check out: Kitchen Spray Painters
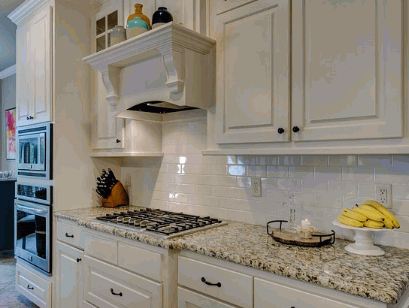
It's not always necessary to hire professionals or spend much money to give your kitchen a facelift; sometimes, just painting the cabinets will do the trick.
In the following parts, we'll go into the step-by-step method to walk you through the essentials of how you can paint kitchen cabinets.
Preparation is the first thing that you need to focus on. So, first, you need to clean and sand the walls and cabinet boxes. To ensure the paint will adhere properly, thoroughly clean the surface.
You only need some water and a non-abrasive cloth to remove the grease and prepare the surface for painting. First, clear off the countertops, empty the cabinets, and remove any freestanding equipment. Move the chairs and tables to the living room.
Using plastic dust sheets over doorways, backsplash, windows, and fixed appliances, you must protect the surroundings from fumes and dust. Mask off the wall around the cabinets. Prepare a painting workspace with a table and chairs.

Returning to the home centre after work has begun is a major waste of time. Here are some of the essential tools and equipment that you need to gather before painting kitchen cabinets:
You can use sandpaper to smooth down the surface of your cabinets, making it easier for the paint to adhere. If you use extremely coarse sandpaper, you risk reducing them to wood. We suggest using 120 grit to give them a light polish so the paint will adhere.
The next step is to clean up the area. You shouldn't paint unless the surface is completely clean of dust. A finish on your cabinets can look rough if even a few annoying particles get on it.
Label the kitchen cupboard doors front and drawer with a marker to keep the doors from getting mixed up. This stamp belongs on the reverse side of the hinge. Pull the doors off the cabinet doors by loosening the hinge screws.
Tape each one with a number, moving clockwise from left to right and top to bottom. Don't forget to number the drawer bottoms and cabinet shelf edges. Don't forget to put away the screws and brackets.
Take apart the handles and hinges at your desk and put them in a separate container. Write the door number from the tape on the unfinished wood under a hinge. Use new tape to cover it.
Put on protective gear and open the windows to let fresh air in. Scrub down all surfaces using an abrasive pad coated in a liquid deglosser. Keep a towel below to soak up any spills. Quickly use a clean rag soaked with deglosser to remove the residue before it dries.
Use a two-part auto body filler to cover the screw holes left behind while repositioning the hardware. You should only combine tiny portions, as it sets in approximately 5 minutes. Because of the filler contracts, it is important to overfill the holes slightly.
Use a paint scraper to remove the excess as soon as it dries. Sand it down to a smooth finish if it hardens. Scuff the exterior of the drawers, cabinet, and doors with a foam sanding block. Don't sand down to the raw wood; this is only a mild sanding to help the primer stick.
Before continuing, wipe away the sanding dust with a tack cloth. Clean the cupboards thoroughly using a vacuum cleaner and a tack cloth to remove any dust that may have settled on the surface.
Kitchen cupboards should be primed and dry for a few hours before painting cabinets. To increase the longevity of your paint, we advise using a water-based primer.
Since these materials are often porous and absorbent, a mist coat should be applied as a primer. After sanding, apply a mist coat of 70 percent paint and 30 percent water. After letting this mist coat dry, paint the kitchen cupboards as usual. Two or three coats of paint will give you the desired result.
First, smooth over the flat surfaces with 220-grit sandpaper. After that, smooth out any profiles with a sanding sponge of medium grit. The wood should finish up feeling glass-smooth.
Apply a small amount of latex caulk along any cracks or holes. (A caulk tube's opening should be no larger than the point of a pencil.) While working, pull the tip and smooth the caulk with a wet finger.
Use a vinyl spackle and a putty knife to fill in and smooth out any dings, scratches, or dents. After waiting an hour for the spackle to dry, sand it again with 220 grit paper, vacuum it up, and then wipe it off with a damp cloth.
Spackle and areas where the sandpaper has "burned through" the primer should be spot-primed with a fast-drying oil-based primer sprayed on using spray paint. After an hour, use 280-grit paper to sand the primer softly. Clean everything with a vacuum and a tack cloth.
It's time to use your favourite shade of paint. Begin painting with even strokes inside the frames and move outward. Using a paintbrush to reach all the nooks and crannies is best.
It's best to start by painting the backs of the cabinet and drawer fronts. It's best to wait until they're dry before tackling the front faces.
Don't rush to reinstall the kitchen cabinets unless you want to undo all of your hard DIY work. You should wait about a week for the paint to dry before re-mounting.
Kitchen cabinet varnish is no longer required. A layer of varnish applied after painting can increase the sheen beyond what an eggshell finish can provide. A word of caution, though: waiting for the varnish to dry before re-mounting your cabinets will only lengthen your overall process.
You can reattach the doors and drawer fronts once the second coat of paint has dried. Take pride in the knowledge that you updated the appearance of your kitchen cabinets without spending a fortune.
Remove the masking tape from the door numbers, replace the hardware, and hang the doors where they go.
Discover: How Much Does It Cost To Spray Paint Kitchen Cabinets

Priming the cabinet surface before painting ensures the fresh paint will adhere well to the wood. A kitchen cabinet's glossy finish or exposure to cooking fluids and grease can render the surface nonporous and slippery.
Once a decent primer has etched into the surface, the paint will have something to grab. Paint is less likely to stick after application if you do not use this adhesive base.
You can improve the adhesion by thoroughly cleaning and lightly sanding the cabinet surfaces. After you remove the dust, prime the cabinets with a product created specifically for this. Do not proceed with painting until the priming has dried.
Kitchen cabinets can collect grime over time from various factors, including food, water, and human contact. These stains will seep into the paint without adequate sealing, leaving behind ugly blotches and an uneven surface.
By sealing these trouble spots with a stain-blocking primer, you may avoid having any preexisting stains mar your new paint job. When picking a primer for your kitchen cupboards, search for materials labelled as "stain-killing."
Water stains, cigarette burns, and tannin bleed from wood are no match for these primers' ability to cover them all.
If you want your paintwork to seem professional, you need a uniform base. Primers hide flaws in the wood's surface or grain pattern that would otherwise be visible after painting. It also makes sure the paint colour is uniform throughout the area.
Use a brush or roller to apply a thin, even coat of primer for the best results. It may take more than one coat of primer to establish a homogeneous base on your cabinets if they have a strong wood grain or dark colours from prior paint. Before moving on to the next layer, ensure the previous one is dried.
Because of the high humidity, high temperature, and high kitchen cleaning frequency, durability is paramount. Priming before painting adds an extra layer of protection that helps the final coat last longer and look better. To maximise the lifespan of your paint job:
Priming a surface before painting can reduce the amount of paint you need. Primer is usually more cost-effective than paint and can speed up the painting process.
Applying a coat of primer first can keep you from using as many applications of more expensive paint. It will cover up the existing cabinet colour and serve as a blank slate upon which the new paint colour may pop. It is especially relevant when switching from dark to bright colours.

Paints designed specifically for painting kitchen cabinets work equally well on wood and acrylic. But remember that non-solid wood finishes like laminate, vinyl, or stainless steel are harder to paint since the paint can flake or chip. Painting laminate-finished cabinets calls for using a bonding primer before painting.
Preparation is the key to a successful cabinet painting project. You need to sand down the cabinets before your first coat of paint so the new paint has something to adhere to. You don't have to sand the cabinets if it is bare wood. Try light sanding with a sanding sponge if your cabinets have a factory finish.

It is not something to be rushed on a lazy Sunday. It's tempting to slap on a coat of paint quickly and thickly, but you'll be sorry you did when even a small scratch removes a large section of colour.
The right paint should be applied in small layers over five to seven days, with dust softly wiped away. It will allow a smooth finish to the cupboards.
Allow the primer a minimum of four hours to dry and the paint a minimum of 24 hours between applications. Doing this ensures that each layer properly cures and helps avoid bubbling or peeling.
Plan on using at least two coats of colour and possibly more for a deep, rich look. Ensure that you apply each layer evenly for uniform saturation.
If you want a sleek, contemporary look, use a fine foam roller; go with brushes for a more traditional, painterly look. High-quality brushes don't shed bristles.
You can avoid filth and grease accumulation with routine cleaning with mild, non-abrasive cleansers. Fix any chips or scratches to safeguard the wood underneath immediately. Your kitchen's new design will last years with the right maintenance.
Explore: Vinyl-Wrapped Kitchens Or Spray-Painted Kitchens

Selecting high-quality and right paint is essential when painting kitchen cabinets. Several paint finishes, such as matt, gloss, and satin, are available. Your preferred aesthetic will determine the finish you go with. Before beginning your kitchen cabinet makeover, check the back of the paint can to see if an undercoat is necessary.
If you want to give your kitchen a new look, a faux finish can give it a country cottage, provincial, or contemporary vibe. It is easy to give your cabinets an aged appearance using crackling glaze, which you can find at most paint stores.
You may use some paint trickery to obtain the same tarnished, gently aged look. Using a paintbrush, lightly scrape the surface of the detail corners, trim, and seams with a colour lighter than the cabinets, then blot the excess paint onto a cloth.
A high-gloss finish, on the other hand, will make your kitchen look sleek and contemporary. To brighten your cabinets, apply a varnish. This method will give your kitchen's surfaces a glossy sheen and deeper colour.
Without requiring major repairs, painting kitchen cupboards is an affordable and dramatic do-it-yourself project that may dramatically improve the appearance of your kitchen. This idea is popular, as seen by how often it appears on websites like Pinterest, proving that a colour change can give your room a new look.
But one should not hasten the procedure. Your project's success depends on the drying period, so be patient, and you'll have a finished kitchen you can be proud of every time you go in.
You can ensure that your painted cupboards withstand use and the test of time by carefully following the instructions, which cover everything from preparation to the last coat. Recall that when you paint kitchen cabinets, it needs to be with care that will produce a polished finish that fits into your daily routine and improves the visual appeal of your house.